Photoshop Non Destructive Sharpening
How to use Photoshop Non Destructive Sharpening Layer
Photo Tip Friday March 27
Sharpening a picture in Photoshop can be very tricky. It requires you to adjust the Amount of sharpening, the Radius and Threshold of the image to achieve the right amount of sharpening. Unfortunately, if you apply the Sharpening directly to the photo and save it you will permanently change the pixels. If, after you print the photo, you realize there is too much sharpening, you cannot readjust it because the effect is embedded in the image. Photoshop CC moved Sharpening as a Filter, which was a great upgrade; but based on the numerous questions regarding sharpening here at Omnilargess and other forums it still doesn’t seem to have solved the issue for many photographers. There are plug-ins you can purchase to make sharpening a little easier but I’m not going to talk about these plug-ins today. Instead I want to teach you a very simple and easy way to not only control the amount of sharpening, but also be able to adjust the sharpening in case it is too much or too little.

Photoshop Non Destructive Sharpening
When applying Sharpening in Photoshop, you’ve probably noticed the noise or grain gets more pronounced as well. It is especially evident in photos with a higher ISO and with images from smaller sensor cameras, such as smart phones or point and shoot cameras. In this tutorial you will learn how to control the amount of sharpening when working with images captured on any device. As mentioned before there is flexibility and many useful features available to you when you work with layers. So let’s jump in and look at another practical technique using Photoshop Layers.
Sharpening an image using Photoshop High Pass Filter
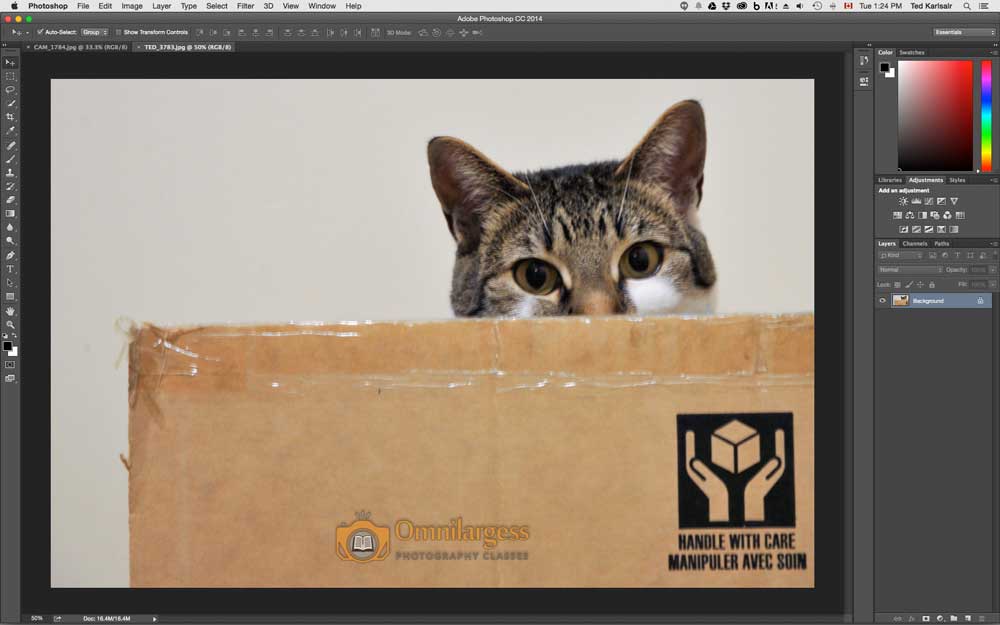
A- Open an image in Photoshop
B- Copy the background Layer
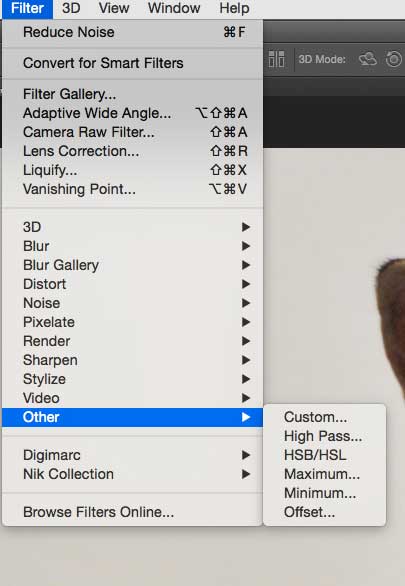
C- Go to Filter> Other> and select High Pass
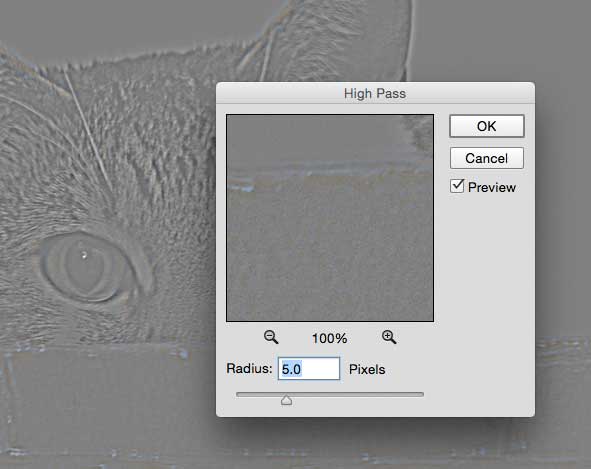
D- In the new widow adjust the Radius until the image gets desaturated and click OK. The amount of radius depends on the size and resolution of your image.
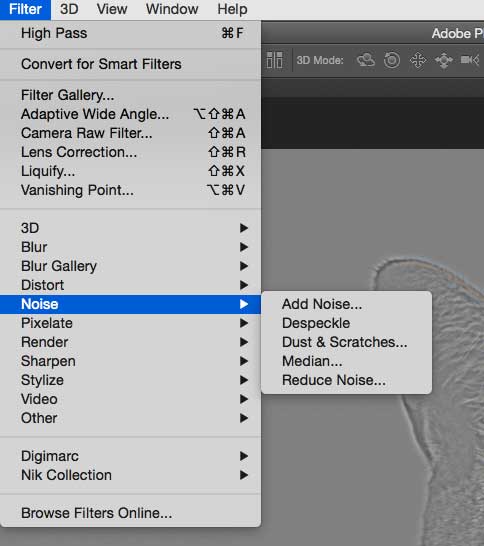
E- Go back to Filter> Noise> Reduce Noise and start adjusting “Strength”, and “Preserve Details” Slider to remove any unwanted noise. Click OK.
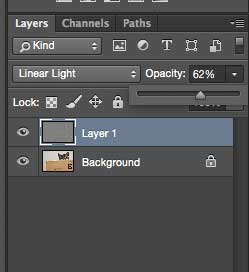
F- Go to Blend Mode and select Linear Light.
G- At this point you’ll probably notice there is lot of sharpening. Go to Layer Panel and start adjusting the Layer’s Opacity to reduce the effects to suit your preference.
Job is done! The good news is when you save your image as PSD (Photoshop format) you can come back at any given time and reduce or increase the sharpness very easily by adjusting the Opacity. Here is the before image.
And here is the image after sharpening is applied.
You can more easily see the benefit of this type of sharpening with Smart phones pictures. Here are some samples of sharpening using this technique.


That is all for this week. If you’d like to learn more about working with non-destructive layers and masks please register for Photoshop Layers and Masks Workshop on April 16.
Ted and the Omnilargess Team


