Lightroom Cropping Technique
Cropping a photo can greatly affect the composition of your image, and change the feel of it dramatically. Although I know we all try, we can’t always 100% of the time get the framing right in camera, maybe you have a wall behind you and can’t move any further, or that tree branch was sticking out just a few inches and you could do nothing about it, in these cases we can crop out the parts that take away from our image, and leave us with a new composition.
There are a few downsides to cropping, foremost is loss of resolution, whenever you crop you are throwing away data for your final image, though with today’s modern cameras with their 16+ megapixels that is less of a concern. Of course, as always with Lightroom being non destructive we can always get our original image and crop back very easily.
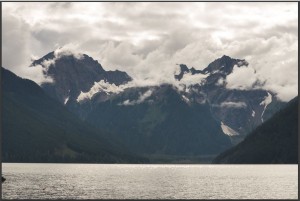
Open up an image in Lightroom, regardless of whether you feel it needs to be cropped or not, this is just going to cover the tools and use of Crop in Lightroom. I’ll be using the following image I took at Jones lake near Hope B.C.


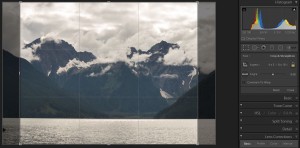
So to get started, lets pop over to the develop tab, and near the top right just under our histogram, is our local adjustment tools, the far left is our crop tool.

Once pressed we are given the crop guidelines on our image, and the options appear just underneath our local adjustment tools.
There are a few options in here, of those though, I feel the most important is the aspect ratio, which is on the right just to the left of the lock. I will be doing a full write up on aspect ratio to explain that in detail shortly.
By default this will be set to “As Shot” And will most likely have the lock disabled, the lock constrains your crop guidelines to the set aspect ratio. So lets say you want to do an 8×10 print of your image, where it says “As Shot”, click on that, and select the “4 x 5 / 8 x 10” option. Our crop guidelines have now come in on the sides, and our lock has been enabled. This is the correct aspect ration to get an 8×10 print done.

You may notice there are little “handles” in the corners and middle of each edge, grabbing and pulling on one of those allows you to shrink and expand your crop box, as it just defaults to a size that fits the image as best it can, it may not be what you want.

As you can see in the previous image, i’ve moved the crop handles to go just around the mountains a bit more, and gotten rid of the water. All I have to do now is press close in the crop tools, and my crop is saved, and I have my new image.

Of course, if you change your mind, just click on the crop tool again in your local adjustments, and you will see your full image is still there. Lightroom does not throw away your pixels it just hides them on you, so you can just work on the image you want to see. Go ahead and experiment with different aspect ratios, or create your own, there is the option to enter custom under the aspect ratio tool, I personally enjoy a 3:1 ratio sometimes, can create quite a striking composition for the right scene.
Jonathan and Omnilargess Team
[SINGLEEVENT single_event_id=”lightroom-bootcamp-2-520142bb27e0a”]
