Photo Tip Friday November 8,
Adjusting Levels in Lightroom for Super High Key images
Sometime creating a Super High key portrait is not that easy. As photographers we always try to capture the photos right in the first place, but there are times that we can not nail it down whir taking the image. Here comes the advantage of Raw format and a good raw convertor software such as Lightroom.
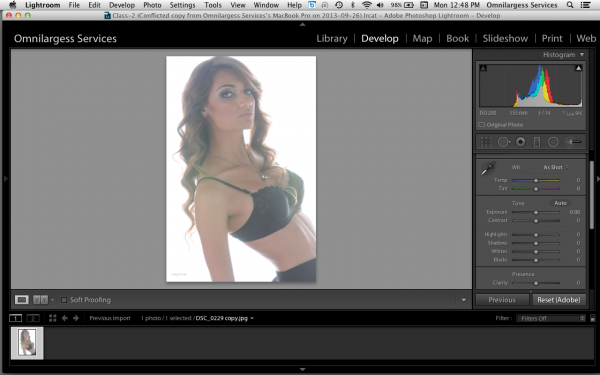
Gary K. took this super high key photo in our October Model photography workshop. No matter how hard you try you can not reduce the haze while taking the photo. Now let’s see how easy it is to do it in Lightroom.
I want to thank Gary K. for his contribution of the photo.
Open photo in Lightroom

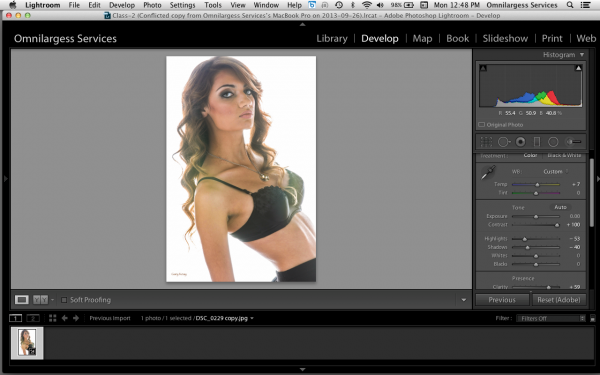
Adjust the Basic adjustments (White balance, Exposure, Contrast, and Clarity). Now you need to adjust Highlights, Shadows, Whites and Blacks.

Now it is time to adjust the Curves

Here is the Before and After

And Before and After in 100%

It is all done. Now you can go to details tab to adjust the sharpness and noise reduction.
That is all for this Friday. See you all again next Friday with new Photo Tip. Enjoy the tip and be sure to register for Lightroom Bootcamp class.
[SINGLEEVENT single_event_id=”lightroom-bootcamp-2-520142bb27e0a”]
Want More Free Photography Tips?
Follow us on Instagram and Facebook for daily photography tips and tutorials.
That is all for now. Stay tuned for my following photography Tips. We love to hear from you. Let us know if you have any questions; feel free to send us your questions, and we will gladly answer them. Follow us on Facebook, Instagram and Twitter for more Free Tutorials and Tips.
Ted and the Omnilargess Team
