Photoshop Layers Tutorial
How to create a Graduated Neutral Density Filter using Photoshop Layers
Photo Tip Friday March 20
Photoshop Layers and Masks can be used for a wide variety of jobs; the best thing about using Photoshop Layers and Mask is that they are non-destructive adjustments.
What does Non-destructive mean?
In simplest terms, whenever you make changes with a photo editing program you change the pixels of the image. If you save the image and close the program, the next time you reopen the image you can not go back to previous stage of the picture. Your original photo (and some of the data) doesn’t exist any more. Additionally when you apply the adjustment directly onto the photos, you can not fine tweak it because you have changed the pixels.
How does Photoshop Layers work?
Consider Photoshop Layers as a transparent layer on top of the original photo. You can apply almost all the adjustments and retouching to this transparent layer without affecting the original photo. You can even go back to a particular layer and make changes. You can also turn off the layer to see the original and turn on the layer to see the effect of the adjustments.
What is a Mask in Photoshop?
Mask is another very, very important tool which works with Photoshop Layers. Masking means you can select where on the image you want to apply the adjustment. In other words, by masking you apply the adjustments locally (specific areas) and not to the entire photo.
In this tutorial I am going to show you one of a thousand ways that you can use Photoshop Layers and Masks to fine tweak an image without changing the original pixels. Did you read that right? Thousands of ways? Yes! This is why we have dedicated a full workshop to Photoshop Layers and Masks. The next Photoshop Layers and Masks workshop is scheduled for April 16 and there are a few spots still available. This two day workshop has plenty of hands-on practice for you to learn these powerful tools and confidently be able to use them in a variety of ways.
How to create a Graduated Neutral Density Filter Using Photoshop Layers and Mask
A- Open an high contrast image which contains strong highlights and deep shadows. Go to Adjustment layers and select Levels. Now start adjusting the Levels to bring back as much details in highlight as you can. (Don’t worry about the mid tones and shadows as they get darker. We are going to mask those areas).
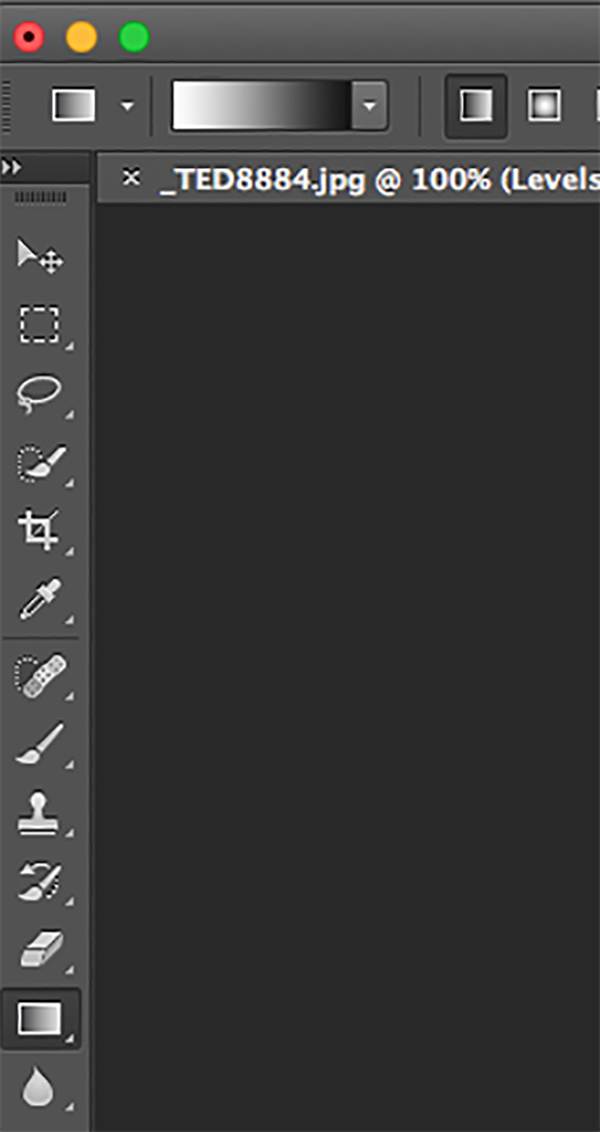
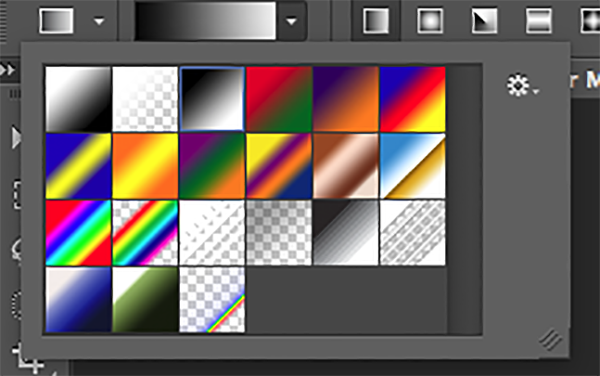
B- Select the Mask on the Layer panel. Then go to Tool bar and select Gradient tool. Make sure that Linear gradient is selected, then go to the gradient Bar and select Black to White Gradient from drop down menu.
C- Since it is a Black to White gradient (Black means no adjustment and White means adjustment), click on the Shadow part of the image and drag it all the way to the starting point of Highlights.
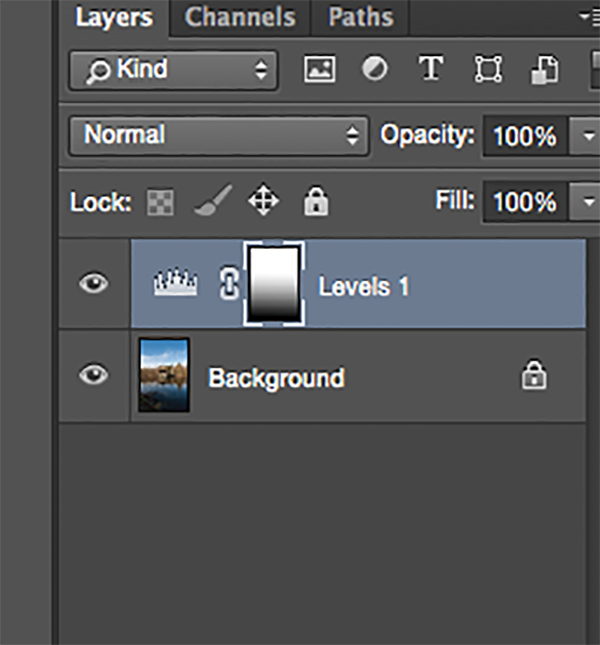
D- As you can see in the Layer Panel, we created a very nice and smooth gradient filter on the Mask of Layer adjustment.
E- Finally, if I want to bring the exposure back to the building and make it brighter I can easily select the Brush tool, pick up the Black colour (as Black means no adjustment), and start brushing areas that I don’t want to apply the adjustment.
F- Here is Before
And here is the After
When I save this image as PSD (Photoshop format) I can go back at any time and make changes to this layer and its mask, without affecting the original photo.
I hope you’ve enjoyed this example of one of the many different ways to use Photoshop Layers and Mask together to apply local adjustments to photos without changing the original pictures.
That is all for this week. If you want to learn more, register for Photoshop Layers and Masks workshop today. Photoshop Layers and Masks is a two day program and starts April 16 and 17 from 7-9 PM.
Ted and the Omnilargess Team


