Photoshop Crop Tool Tip
Photoshop Hidden Gem series
Photo Tip Friday July 18, 2014
Photoshop is the most popular editing software around. It is also a vast program to learn and I don’t know of anyone who can claim to know everything in Photoshop. This is why, once in awhile, we are excited to find some Hidden Gems in Photoshop. In this series of Photoshop Tips I am going to share some of these hidden gems. These hidden features can improve our editing skills and save us lots of time. In this article I am going to share the hidden feature of Photoshop Crop Tool.
Do you know any Photoshop hidden gems and want to share it? Feel free to send me your tips and I will post it on our website for everyone to enjoy.
Photoshop Crop Tool hidden feature
We all know that Photoshop Crop Tool is for removing unwanted pixels (area) from a photo. Did you know we can also use Photoshop Crop Tool to add pixels to an image? Here it how it’s done:
1-Open the image in Photoshop

2-Crop the image to the your taste

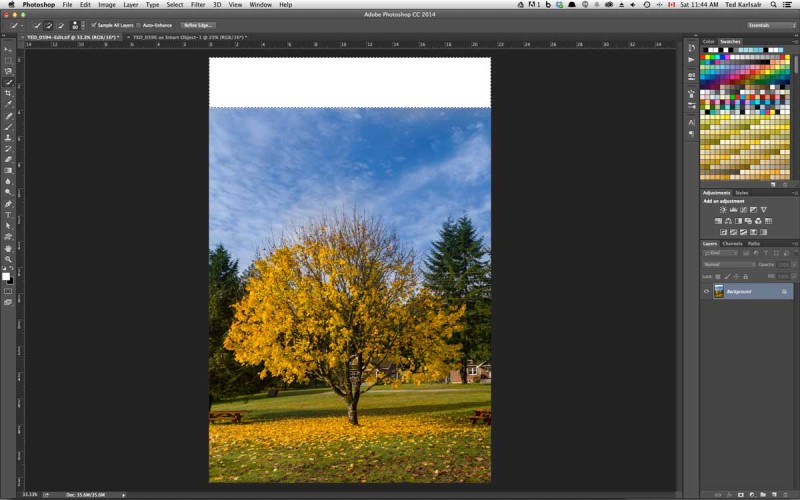
3-In this example I want to add more of the sky in to my photo. The Crop Tool in Photoshop CC 2014 works as a Layer and when I expanded the cropped section I ended up with an empty (transparent) area (as you can see in above photo)
4-Go to Layer and Flatten the image. Now you have a white area.

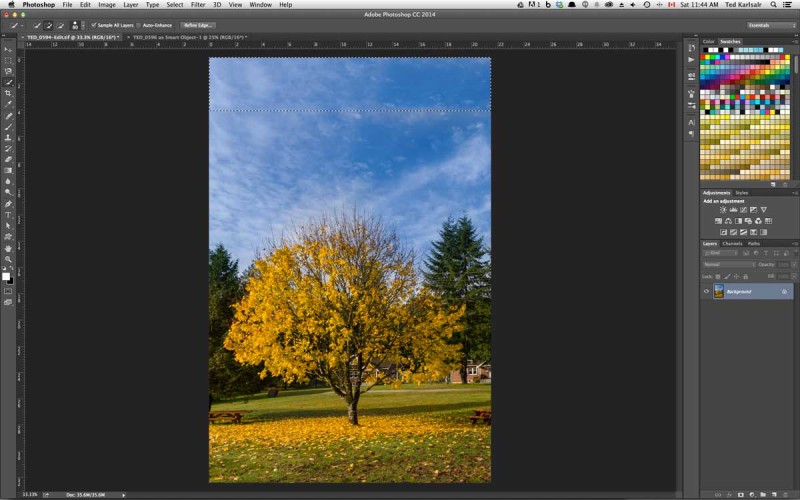
5-Select the white area by using the Quick Selection or Magic Wand tool.

6-Hit the Delete button on your keyboard and select Content Aware option in drop down menu.

7-The job is done in no time, with possibly only a little cleaning up around the edges to make it look natural.

Our next Photoshop Bootcamp is scheduled for September 6, 2014 where you will learn the most popular and efficient techniques in Photoshop editing. Check out the course description for more information.
Ted and the Omnilargess Team

