Photoshop Tutorial
Photo Tip Friday April 11, 2014
How to create Raindrops in Photoshop
Creating a water drop in Photoshop is very easy and simple. But creating raindrops is different. It needs more advanced techniques. In this Photoshop tutorial I will show you how to create raindrops and add a different look to some of your images. Credit for this tutorial goes to Howard Pinsky who gave me the insight of doing this tutorial. I modified his techniques a little to make it easier. Here are the before and after images.
In this Photoshop Tutorial, you learn how to change this image:
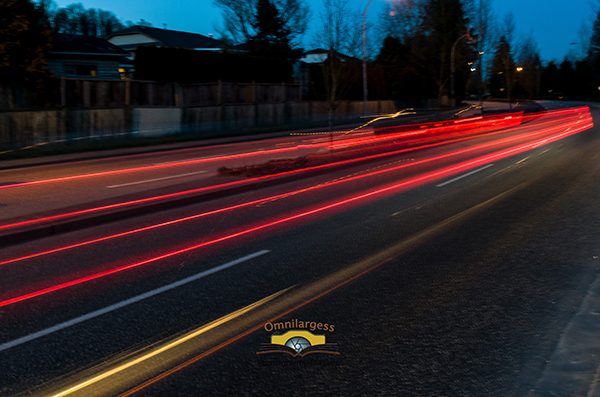
To a more dramatic image like this:

Are you ready? Let’s get wet ( I mean started).
-Open your photo in Photoshop and Choose the Brush tool. Choose a hard Brush and select the size as you like it.
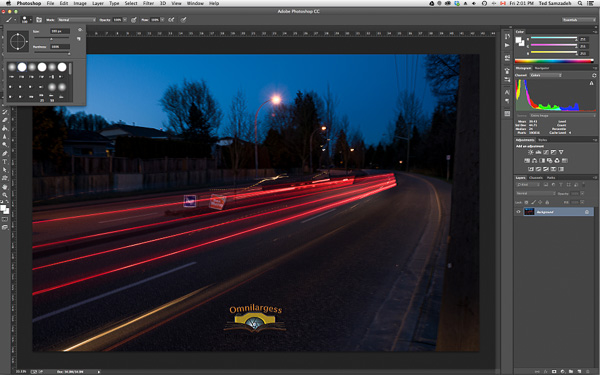
-Go to Brush Panel (under the Window Menu) and Change the Spacing to a higher number such as 800-1000
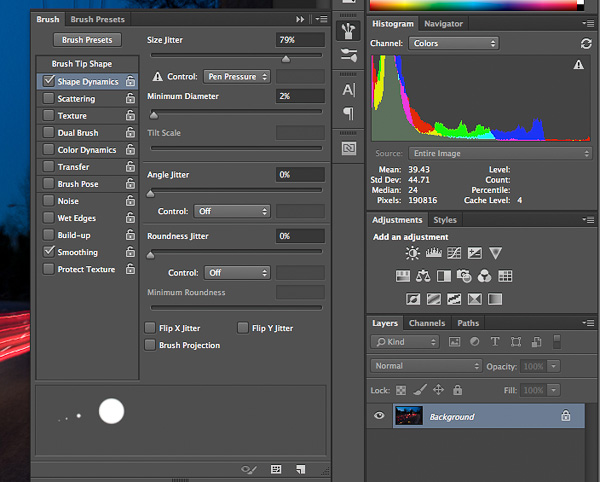
-On the Brush Panel, go to Shape Dynamic and turn it on, then adjust “Size Jitter to 70%-80%
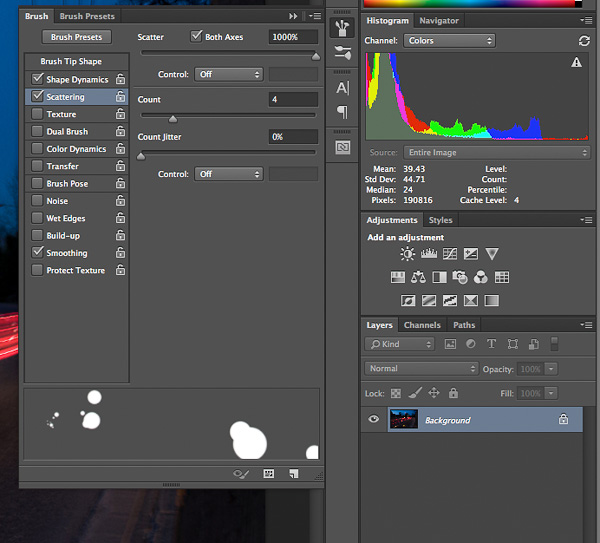
-Go to Scattering> Select “Both Axes” and set it to 1000%. You can adjust the “Count” for more drops as you paint.
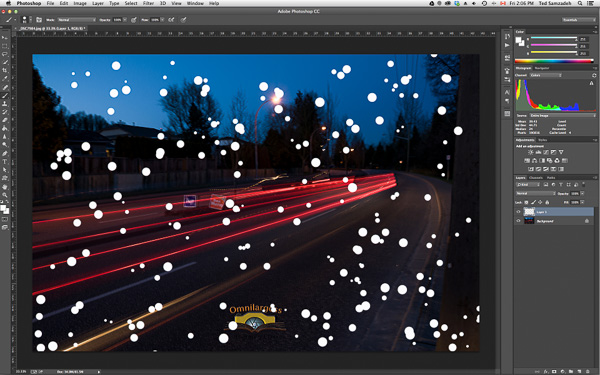
– Now that we modified our Brush it is time to create a new layer; select White as your colour and start brushing on the new Layer.
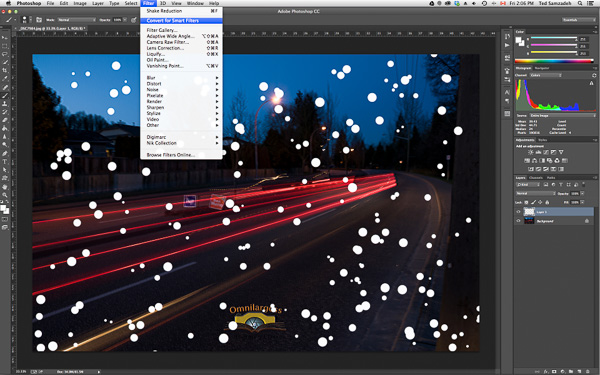
– Go to Filter and convert the Layer into a Smart Object.
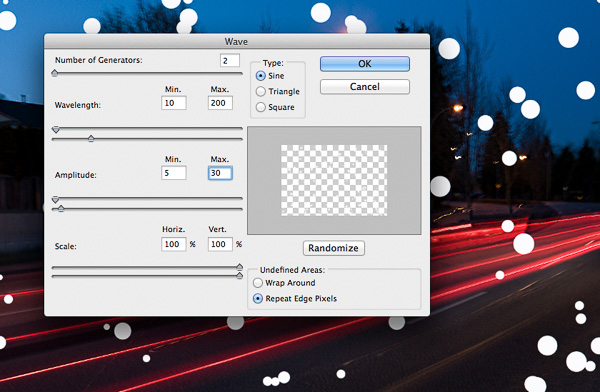
Now all the drops are perfectly round, but we do not want them round. So go to Filter. Distort> Wave and then set the “Number of Generators” to 2, Wave Length Minimum 10 and Maximum 200
-Now the brushed dots aren’t round any more; our next step is to add a ripple to them. Go to Filter> Distort>Ripple – set the value for amount to -55 and select Large for the size.
Now it is time to add some Effects to our layer.
Open Layer Style and change the FILL Opacity to 0 (DO NOT change the Opacity, just the FILL Opacity to 0)
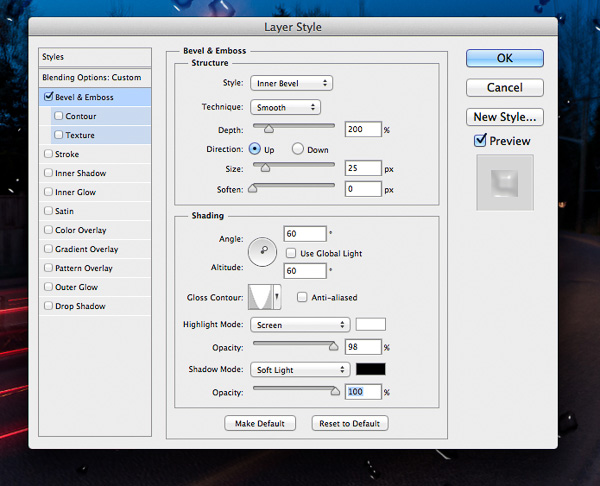
Add Bevel and Emboss. Change the value of depth to 200%, Size to 25, turn off Global Light, set the Angle and Altitude to 60. Set the Glass Contour to “Cone-Inverted”, Highlight mode to Screen with 100% opacity, and Shadow Mode to “Soft Light” with Opacity at 100%
Next select the Inner Shadow, set the Blend Mode to “Soft Light” with colour set to White, set the Angle to -120, turn off Global Light and set values 20 for Distance and 25 for Size, select Cone for Contour
Go to Drop Shadow, select Soft Light, set the colour to Black, Opacity to 100%, Turn off Global Light, set the Angle to 60, for distance set it to 2 and for size set to 6
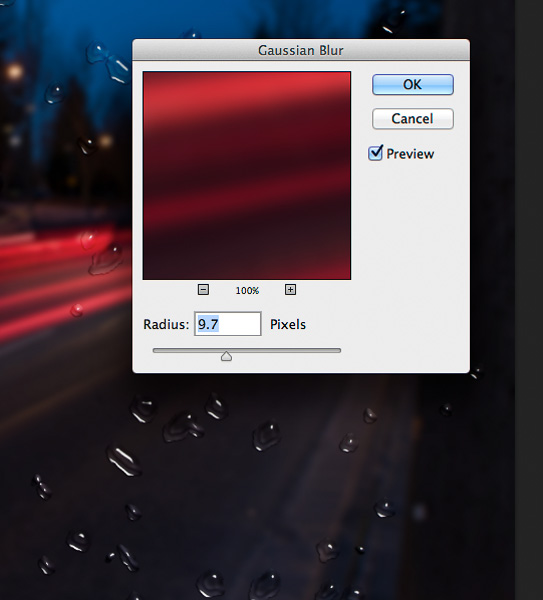
We are almost done. To make the image more realistic, copy your background layer and convert it to Smart Filter, then go to Filter> Blur>Gaussian Blur and adjust the blur to your taste.
To make it even more interesting, go to Filter Gallery>Distort>Glass and experiment with a frosted effect to your image.

And the job is done!
I hope you enjoyed this tutorial. If you want to learn more fun and creative techniques, register for our Photoshop Bootcamp.
Ted and the Omnilargess Team
[SINGLEEVENT single_event_id=”photoshop-bootcamp-2-52b362b5868e7″]


